The Blue Ox Patriot Brake is a versatile flat tow brake system for full-size SUVs, pickups, compact cars, hybrids, or multiple vehicles with different floorplan configurations. It provides real braking action with the same force as a foot on the brake pedal, in the middle of the pedal, at the same angle for true, responsive braking that is quicker and more responsive. When you purchase a Patriot Brake, you get everything you need right in the box. There is no tank to drain, no pumps or hoses to connect, and no mess. Learn how to install this flat tow brake below.
Towed Vehicle Set Up
Step 1
Start by opening the driver’s side door of the towed vehicle and adjust the driver’s seat to be as far back as possible.
Step 2
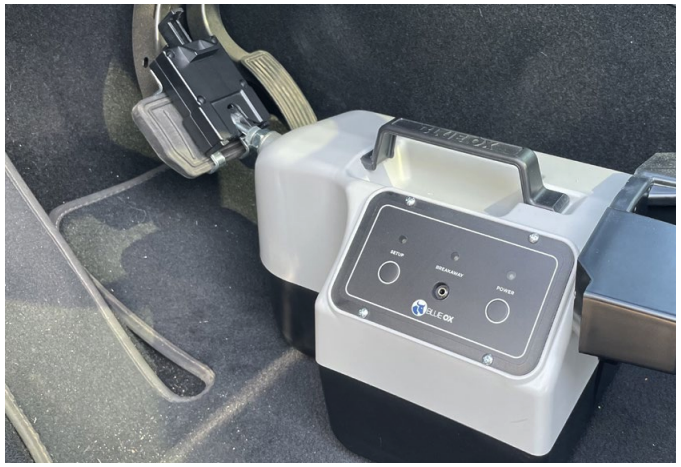
Place your Patriot Brake unit on the floor of the driver’s side.
Step 3
Open the brake claw and secure it onto the brake pedal.
Step 4
You have the option of using the Patriot Brake with or without the feet. If necessary, the feet can be attached and adjusted to get them in the proper position if your floorboards are uneven.
Step 5
Plug the power cord into a constant 12-volt power supply. You will know the unit has power when the indicator light on the cord is glowing.
Step 6
Be certain that the towed vehicle is not running.
Note: Each time the tow vehicle is started up, the Patriot Brake needs to be reset.
Step 7
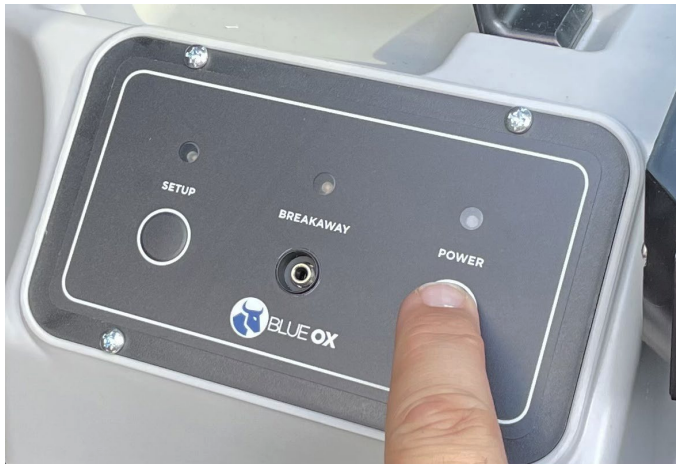
Press the power button and allow the actuator to briefly adjust itself. The indicator lights will blink in a repeating sequence.
Note: If the lights are solid blue and red, there is too much pressure on the brake pedal. Pull the brake unit back away from the pedal until the lights switch to a blinking blue and green sequence.
Step 8
Adjust the push pad up or down for proper height position in relation to the seat.
Step 9
Move the driver seat forward so it is against the push pads. If the lights switch to solid blue and red, there is too much pressure on the back of the brake. Move the seat back until the lights resume normal sequence. You will be unable to continue setup until the lights flash blue and green.
Note: The seat should not put any pressure on the back of the brake unit.
Step 10
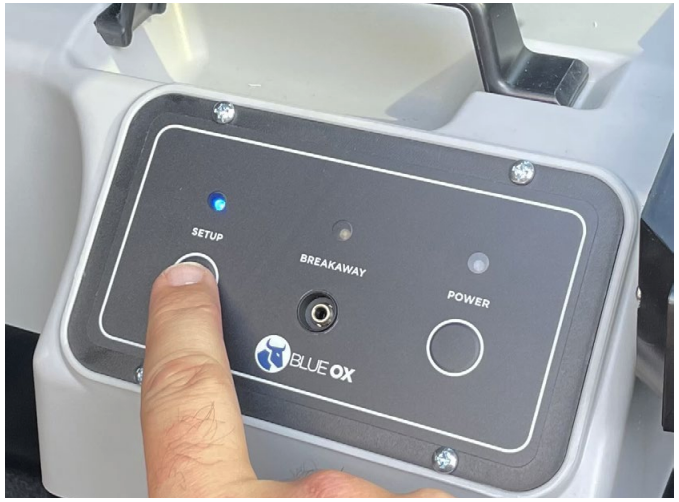
Push the “SETUP” button. The actuator arm will then cycle only once, then remain in the ready position. The power light will illuminate green if the brake is set up correctly. Refer to the remote for any errors encountered during setup.
Note: Make sure the tow brake is in Hybrid mode for any continuous power assist brakes or hybrid vehicles. See “Installation Notes” below for more details.
Motor Coach Set Up
You will now need to set up the RF controller inside your motor coach.
Step 1
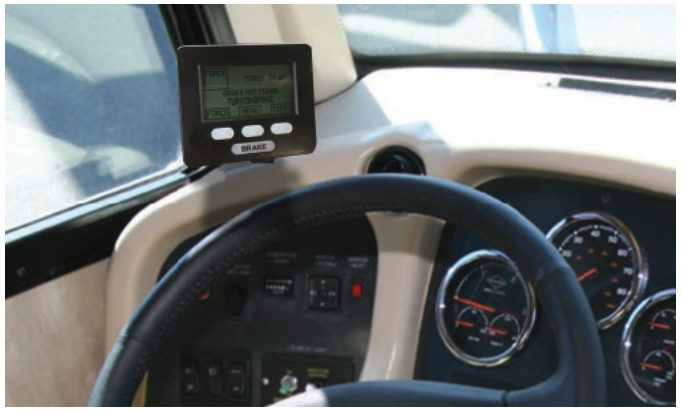
Start by finding a sturdy, easy-to-reach location to mount the RF in-coach controller. The dashboard is the best mounting point, but another secure location that is accessible to the driver will work.
Step 2
Use the Velcro provided to attach one side to the chosen mounting point and the other side to the controller.
Step 3
Place the remote in the rubber stand provided and rest it on a flat section of the dashboard. Make sure both the dash and the stand are clean and dust free before use.
Note: While parked, the BRAKE button on the remote can be used to activate the Tow Brake and ensure it is working correctly. The vehicle needs to be moving for the tow brake to work automatically.
Note: The Patriot Brake should be used with the RF controller. We recommend using the controller for the operational feedback; however, if necessary, the brake can be used without the RF controller present.
Locking Brake Claw Operating Instructions
To Open:
- Place your thumb on top of the claw and place your pointer finger under the back ledge.

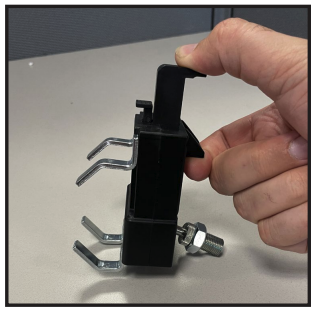
Pinch your fingers together until the claw locks in place.
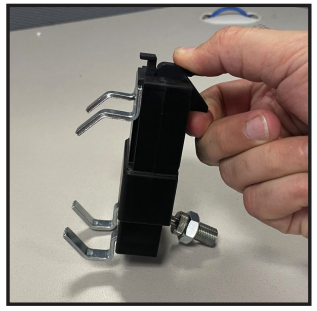
To Close:
- Position the claw onto the brake pedal.
NOTE: If you need to adjust the size of the claw, you can change where the top fangs are mounted or switch out the top fangs for the XL fangs.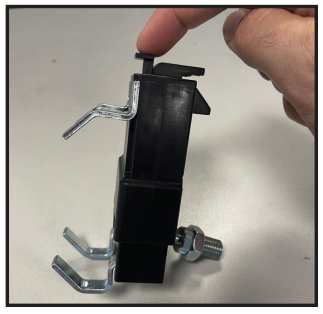
- Press the button on top of the claw to close the claw or push the front button against the brake pedal.
Caution: Make sure your fingers are not between the upper and lower half of the claw when you press the button.
Breakaway Installation
The Breakaway system is an emergency system that is required by law in most states and provinces. In the event that your motor home separates from the towed vehicle, the Breakaway system automatically activates the Patriot Brake to apply to brakes in your towed vehicle.
Mounting the Breakaway Switch
Step 1
Start with the pin facing the motorhome and secure the breakaway switch onto the front of the towed vehicle in a sturdy location. This should be a convenient location that can be easily reached and, if possible, on the driver’s side.
Note: The breakaway switch must be mounted directly on the towed vehicle and should not be installed on the tow bar or bracket. The surface must be strong enough to hold the breakaway switch and allow for the pin to be pulled out cleanly.
Step 2
Be sure that the switch is attached securely and that the pin can be removed from the switch with no interference. Plug the cable into the breakaway switch.
Step 3
Using a bolt and lock nut, install the breakaway switch. Do not use a self-taping screw.
Connecting the Breakaway Switch to the Patriot Brake
There are two different ways to attach the breakaway device to the Patriot Brake. You can choose the method which is most convenient for you.
Method 1: Connect Through the Firewall
- Check to see if there is a pre-existing hole in the firewall; if not, drill a ½” diameter hole. Next, insert a grommet into the hole.
Note: Take care not to damage any components on either side of the firewall while drilling.
- Locate a path for the cable to feed through the engine compartment to the firewall. Use wire ties to secure the cable. Be certain to avoid any hot or moving engine parts.
- Insert the cable into the grommet and pull the excess slack into the driver’s compartment. Seal around the grommet and inside the grommet with silicone sealant.
- Plug the cable into the Patriot Brake.
Note: When not in use, the cable can be tucked away.
Method 2: Feed Cable Through the Door or Window
- Locate a path to feed the cable through the engine compartment to the rear of the hood/base of the windshield on the driver’s side. Then, use nylon ties to secure the cable. Be sure to avoid any hot or moving engine parts.
- Next, you can either roll down the window and thread the cable through or open the door and thread the cable through that way. Make sure any excess slack is safely coiled inside the driver’s cockpit. Once the cable is fed through and connected, close the door or window.
Installation Notes
When installing the Patriot Brake on a hybrid vehicle or vehicles with continuous power assist brakes, the following steps are required:
- With the brake plugged in and turned on, use the remote to access the “FORCE” adjustment screen.
- Use the left button to lower the Force setting all the way past 0 until you see “H” for Hybrid mode.
- Press “OK” Button
Note: Use the MAX FORCE setting in the SETUP menu to adjust how hard the brakes apply in Hybrid mode.
Knowing how to install the flat tow brake, Patriot Brake, from Blue Ox will ensure you are traveling safely with your flat tow vehicle. You can view the complete Patriot Brake owner’s manual to learn more about the operating instructions, how to disconnect the Patriot Brake, error codes you may encounter, how to properly care for your Patriot Brake, accessories, how to install the flat tow brake, and more.